Updated on January 03, 2025
Sewing machines can be essential instruments for those who love crafting and sewing, but like all mechanical devices, they can encounter problems like sewing machine needle stuck in down position that hinder their performance.
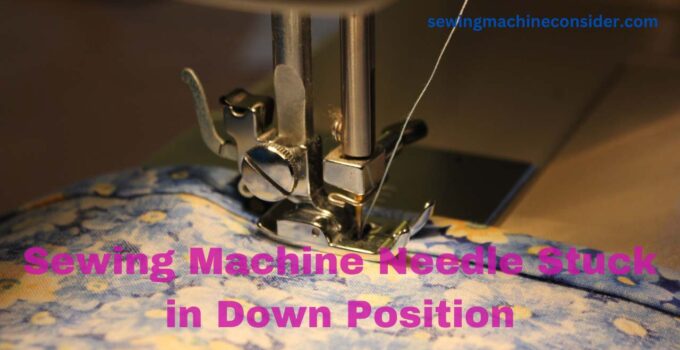
Moreover, one of the issues sewists might face is when the sewing machine needle stuck in a down position. It causes the machine to stop working completely.
Therefore, in this thorough guide, we will explore the causes and solutions for jammed needles and offer practical solutions to stop the possibility of recurring needle jammings.
Why Is the Sewing Machine Needle Stuck in Down Position?
If your sewing machine needle is stuck in a down position in Tamil while stitching, it has encountered an obstacle, like tension in the fabric. Many causes hinder its rise to the proper level, for example:
1. Needle Insertion Wasn’t Correct
If the needle of your sewing machine has stopped working due to incorrect needle placement, Don’t be concerned; it’s a fixable mistake that shouldn’t hinder sewing from going easily. To address sewing machine needle problems.
1. Turn Off Your Machine And Unplug it First: Your safety is paramount, and you avoid problems when making any adjustments.
2. Raise the Needle Bar: Use a handwheel or electronic to lift the needle bar until it reaches its highest level.
3. Get Rid of Old Needles: Take your time loosening and remove the screw that holds needles before carefully removing any needles from their clamps.
4. Introduction of your New Needle: Carefully secure the new needle to the clamp so that its flat face is away from the back of your machine. Moving upwards until its limit is reached, tighten the screw securely to lock your new needle tightly into the clamp.
5. Test Needle Movement by turning the handwheel by hand and then observing the movement upwards and downwards without obstruction.
2. The Needle Didn’t Go Further Up the Holder
If the needle is not moving on the sewing machine in their holders, it can be a source of anxiety. To work optimally during sewing machine needles from getting stuck, they must be properly fitted into their holders for a smooth sewing process. To address the issue;
1. Turn Off The Machine. To ensure your safety, measure, shut off, and disconnect your machine from the power source before attempting to align the needle properly.
2. Release the Needle Clamp Screw: gently loosening the screw that holds the needle is enough to release the current needle in its holder and free it in the needle holder.
3. Reinserting the Needle: Carefully insert the needle into its holder, making sure its flat end faces towards the rear of the machine while its point faces toward its front edge. Push as hard as you can until its movement ceases upward or downward.
4. Needle Clamp Screw: Ensure the sewing machine needle from getting loose; the clamp screw is tightened When the needle is properly placed, then tighten the clamp screw to secure it.
5. Check Needle Movement: Turn the handwheel and see that the needle can move freely between the two sides without obstruction. This step will show if the needle has been correctly placed.
3. Improper Machine Threading
Incorrect threading of your machine needle can swiftly cause the end of whatever project you’re working on, resulting in a needle jammed in the sewing machine and other issues regarding embroidery and stitching machines.
1. Switch off the machine and disconnect it to ensure safety: Like any machine sewing, you should first check that it is shut off and unplugged to avoid any safety issues.
2. Unthread Your Machine: Start by completely unthreading your sewing machine needle thread, the upper thread, and threads for bobbins.
3. Check Tension Discs and Guides: Before you begin threading, ensure the thread is smooth through all tension discs and guides. Incorrect threading of the tension mechanism could cause needle jamming.
4. Reinsert Needle: After completing the rethreading process, insert the newly threaded needle into its needle holder and ensure that it is facing in the right direction and is firmly in its shell.
5. The Machine is Operating Properly: After threading has been completed, move the handwheel by hand and make sure the needle moves effortlessly up and down. Then, stitch a scrap fabric.
4. Improper Threading of the Bobbin
Sewing machines getting stuck in the bobbin due to improper threading of their bobbins can cause significant sewing problems and cause frustration. Not least, when threaded incorrectly, they could result in threads that are tangled and jammed needles.
1. Stop the Machine: To ensure your safety, Start by unplugging and turning off the machine before threading its bobbin.
2. Remove the Bobbin: Open the bobbin compartment, and then begin by unthreading and removing the holder from its place to gain access to and remove the bobbin out of its place. Get rid of any loose thread from the inside of it to prevent any future issues.
3. Check your Bobbin Thread Paths: Note the proper thread path according to your sewing machine’s manual to thread bobbins correctly and properly into their containers.
4. Insert the Bobbin Correctly: Before returning the bobbin to its case, ensure it goes through all slots and tension guides according to the recommendations in your machine’s user guide manual.
5. Conduct an Affiliation Check. When the threads from the bobbin are properly interlocked and threaded onto the appropriate needles, check your sewing machine manually turning the handwheel.
5. Dull or Broken Needles
A broken needle stuck in a sewing machine that has become stuck because of being broken or dull is a frequent annoyance that can halt the sewing process. With the wear and tear of needles, sewing machine needles won’t move up and down. If they are left unattended for a long time or without the necessary replacements, they can fail or get stuck during sewing, resulting in slower progress or even no sewing!
To place the needle in the sewing machine, take these steps to check and replace the needles:
1. Unscrew the needle holder: Turn Off and Unplug to Remove the broken sewing machine needle
2. Remove the old needle: loosen the needle clamp screw slowly before taking care when disconnecting the sewing machine.
3. Examine the Needle: needle for any signs of dullness or damage. If it is bent or visible burrs, replacing it should be considered as soon as feasible.
4. Choose a Suitable Needle: Choose a needle for your sewing project by choosing the appropriate size and type for the fabric thickness you plan to sew.
5. Set up your New Needle: Place the new needle in its holder. Ensure its height is up to the back and the flat side is facing toward it. After that, tighten the clamp screw to ensure security.
6. Check Your Equipment: If the Sewing machine handwheel stuck, turn the handwheel and make some stitches on a scrap of fabric to see whether the new needle works as expected.
Tips to Prevent Sewing Machine Needle Stuck in Down Position
- Assure the correct needle size and size are chosen to match both your project, fabric type, and sewing project requirements.
- Replace your sewing machine needles whenever they show indications of bending, dullness, or damage
- Refer to the manufacturer’s instruction to thread it correctly to ensure the most efficient sewing machine operation
- Regularly keep your machine clean and well-maintained. Sewing machine to eliminate dust, lint, and other debris that can build up over time.
- Make sure you use high-end thread compatible with the fabric you’re sewing on to achieve the best performance, not old or inefficient.
- Check that the bobbin has been properly inserted into its case, free of knots or loose threads that could hinder sewing smoothly.
- Correct tension adjustments are paramount to maximize stitch quality for needle and stitch quality.
- Sew slowly to maximize the control of your machine over heavy or difficult fabrics, and stay clear of sewing at high speed.
- Ensure your sewing machine is well-oiled and functioning by checking its maintenance schedule frequently.
Conclusion
In conclusion, the sewing machine needle stuck in a down position could be a frustrating experience. However, with the right maintenance and care, it can sometimes be avoided. Following the suggestions, you can enjoy smooth sewing and avoid interruptions to your creativity. Good luck sewing!
FAQs
How to fix the sewing machine needle?
Check that the needle is securely installed in its clamp. If damaged or bent needles need replacing with new needles of similar size and type.
Does using the wrong needle size make my needle stuck?
A wrong needle can result in the needle getting jammed, causing sewing problems and needle jams.
How Often Should You Replace the Sewing Machine Needle?
Needles should be replaced regularly depending on the frequency and complexity of your sewing tasks. Generally, the needle change should happen every 8-10 hours during sewing.
How to remove needles from sewing machines?
Unplug and turn off your sewing machine as a precautionary measure, then loosen the needle clamp screw before gently pulling down to extract its needle from its position.
Read more:-)